← All guides

Share a deck with a link, or export its cards

4 min · Last checked: November 2026

You made a deck and a friend wants it? Share it with a link: they add their own copy in one tap. Or copy the cards out as plain text to use somewhere else. Both are free.

How to read the pictures: the red frame shows what to tap, and its number is the number of the step.

A deck must be public before you can share it. Public means: anyone with the link can look at it and add it. Your other decks stay private.

  1. Open your deck and tap the orange ... button at the bottom right.
  2. Tap Share Deck.
  3. If the deck is private, the app says You first have to set your deck to public. See "Make a deck public" below, then come back.
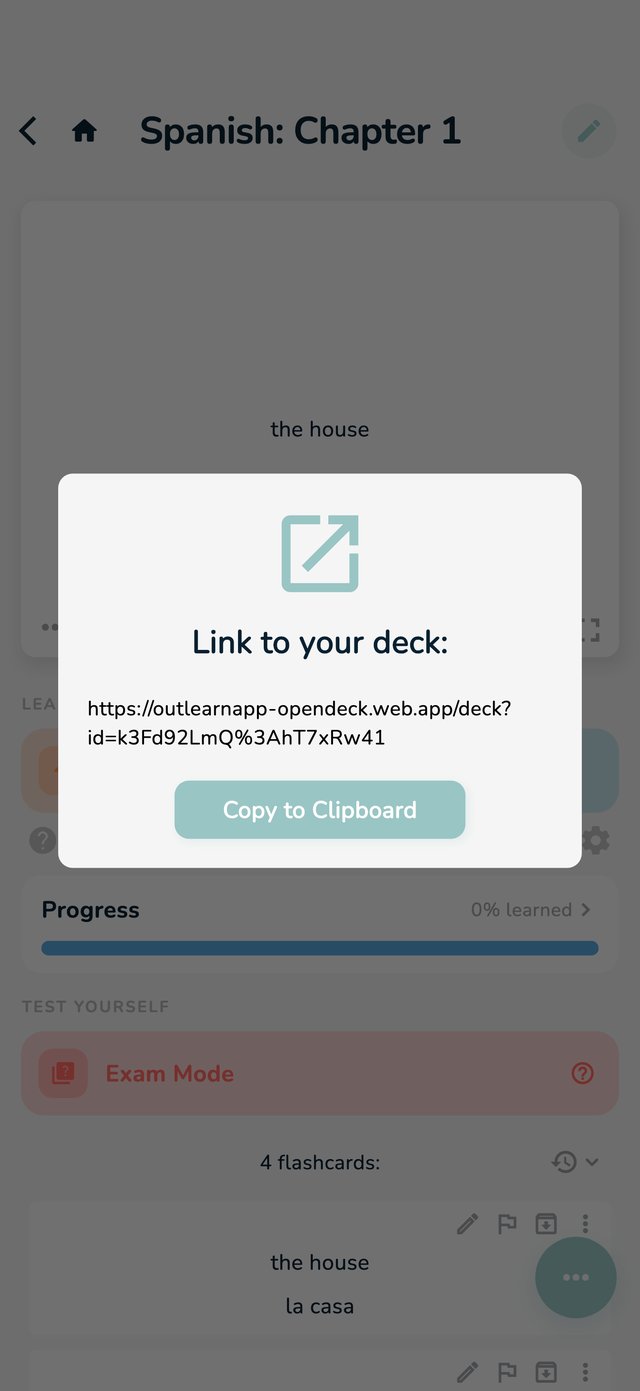
  4. The window Link to your deck: shows the link. Tap Copy to Clipboard, then paste it into a message, an email or your class chat.
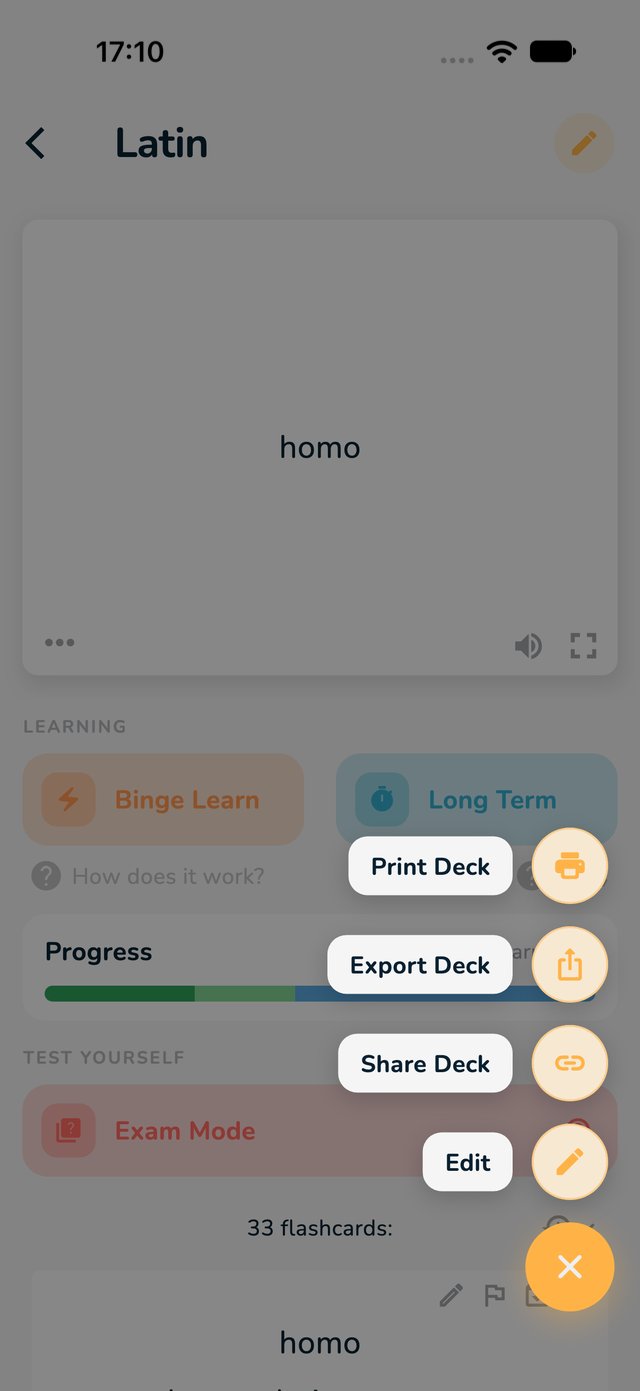
The deck page with the orange button and Share Deck marked in red
1: the orange button. 2: Share Deck.
The window with the link to your deck and the Copy to Clipboard button marked in red
4: Copy to Clipboard.

Make a deck public

  1. Open your deck and tap the pencil to open the editor.
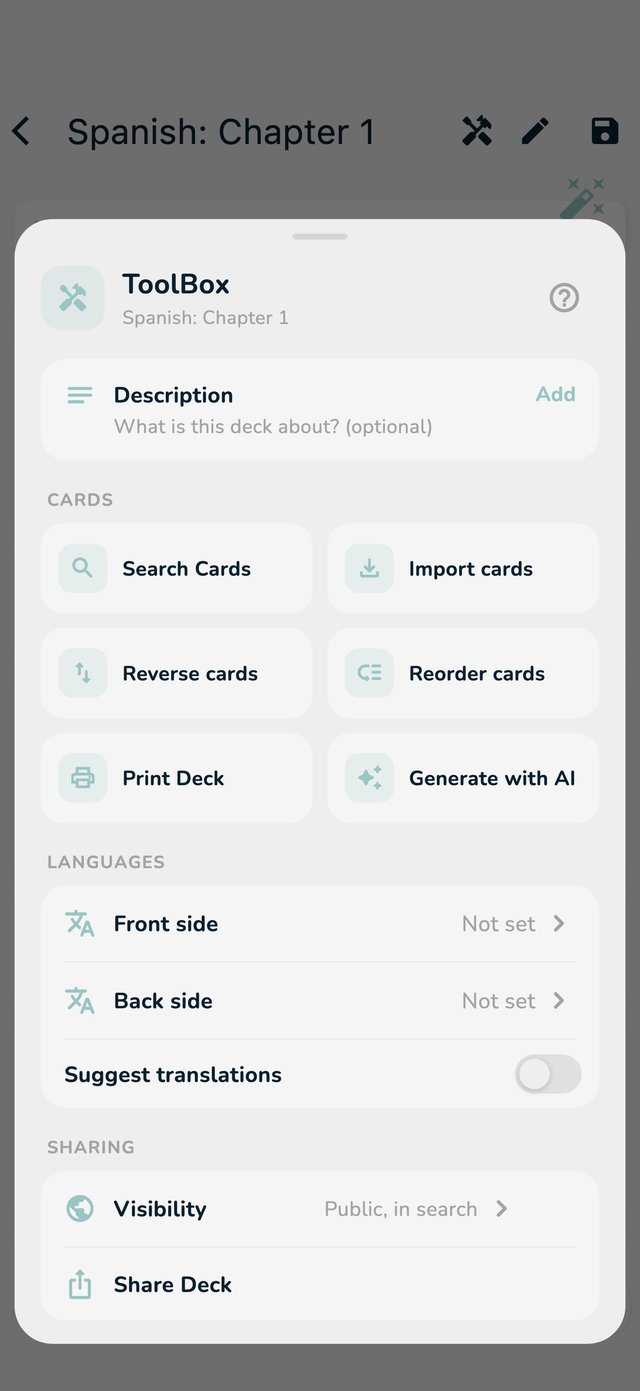
  2. Tap Tools (the wrench at the top), and find the section Sharing.
  3. Tap Visibility and switch on Public Deck. It is shared as soon as the switch is on.
  4. Choose if the deck may be found by everyone: Show In Search is on by default. Switch it off and only people with your link can find the deck. Good for a class or a study group.
The Tools of the editor, with the Visibility row marked in red
3: Visibility (inside: Public Deck and Show In Search). Below: Share Deck.

You can also set Public Deck under Visibility when you make a new deck. Public decks cannot be changed while you are offline: the app says Cannot be changed offline.

What the other person does

  1. They open your link. On a phone with OutLearn, the deck opens in the app. Without the app, it opens in the browser.
  2. They look at the deck. Save for later keeps it for them, or they tap Import.
  3. They choose a folder (Select Folder). The deck lands there as their own copy.

Someone needs a free OutLearn account to add a deck. Their copy is theirs: if they change it, your deck stays as it is. If you change your deck later, their copy stays as it was. You cannot add your own shared deck to yourself.

Stop sharing

Switch Public Deck off in Tools, under Sharing, in Visibility. The link stops working and the deck disappears from the search. People who already added the deck keep their copies.

Export the cards as text

To use your cards somewhere else, or to copy them into another account, export them as plain text.

  1. On your deck, tap the orange ... button and choose Export Deck.
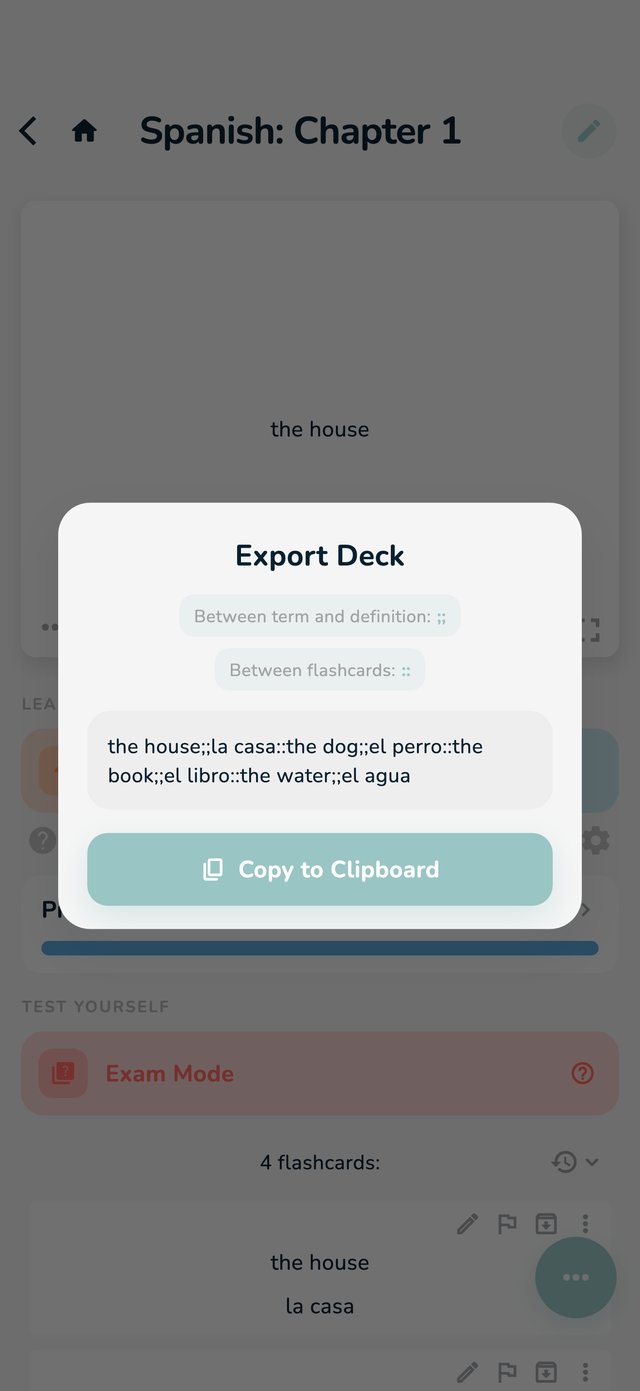
  2. You see all your cards as one text: the front and the back of each card are joined with ;;, and the cards are separated by ::. The window says so under Between term and definition: and Between flashcards:.
  3. Tap Copy to Clipboard. The message Copied to Clipboard appears.
The deck page with the orange button and Export Deck marked in red
1: the orange button. 2: Export Deck.
The Export Deck window with the two separators and Copy to Clipboard marked in red
2: the two separators. 3: Copy to Clipboard.

Only the text of the front and the back is exported. Pictures, notes and your progress stay in OutLearn.

Put an export into another deck

  1. In the folder where it should go, tap import from other app: see Move your sets over from Quizlet.
  2. Paste the text into the box.
  3. Under Between term and definition, choose Custom and type ;;.
  4. Under Between flashcards, choose Custom and type ::. Then tap Import.

Other ways to take your cards along

  • On paper: see Print your cards.
  • A deck from a teacher (in a class folder) cannot be exported or shared, but it can be printed.